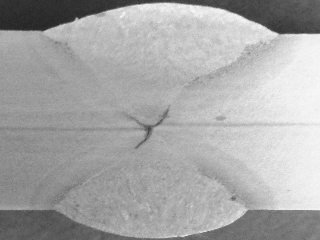
Macro test or macro examination is performed on the cross section, longitudinal section or 'Z' direction (through thickness) as an independent test to evaluate subsurface conditions or as an subsequent step of another test to reveal the effects on the subsurface.
Generally macro test or examination is performed at less than 10x magnification. Several semi-finished and samples of finished products are subjected to macro test to reveal internal discontinuities such as impurities, inclusions in rolled products or grain flow in forgings after exposure to appropriate preparation and exposure to chemicals or heat.
Macro test is also performed on the test specimens exposed to other tests such corrosion resistance test, passivation, salt spray test, case depth measurement.

The most common test is weld cross section examination to reveal internal discontinuities, weld profile, weld passes and sequence, extent of penetration and the quality of weld.
LMATS Melbourne and Sydney laboratories performs weld macro examination to satisfy the requirements of huge fabrication industry in Australia. LMATS performs macro examination in accordance with AS 2205.5, ASME IX QW 183, QW 184, EN 1321, AS 1554, AS 3992, AS 2885.2 and similar national and international standards.

